QuietCool QC48B2 Owner's Manual

Browse online or download Owner's Manual for Air filters QuietCool QC48B2. QuietCool QC48B2 Owner`s manual User Manual

  • Download
  • Add to my manuals
  • Print
  • Page
    / 15
  • Table of contents
  • BOOKMARKS
  • Rated. / 5. Based on customer reviews
Page view 0
Carefully examine your QuietCool shipping carton. If your carton is
damaged – notify the shipper immediately! (There may be damage to unit).
1. Unpack your new QuietCool unit
Your QC48B2” unit was shipped on a wooden skid strapped to a cardboard
cover with lid. First remove the straps from the base where cardboard meets the
skid – then you may lift the whole cardboard box (and lid) off the unit and skid.
Lift your QuietCool unit off the wooden skid. Now roll your QuietCool unit to a
level surface and lock the casters to prevent accidental movement.
2. Connect the water supply
Connect standard water hose to female fitting on the right side of your QuietCool
(fan blade side). If your water pressure is above 60 psi you must use a pressure
regulator (found at your local hardware store). Note: Do not connect to water
source exceeding 60 psi – this can cause
damage to your unit.
3. Connect the electrical supply
Your QuietCool model requires a regular 3
prongs, ground with 120 volt power supply.
Plug electrical cord into receptacle. To be
safe – make sure no other equipment is
plugged into the same circuit. Your
QuietCool will run smoothly on a standard
20 amp, 120 volt, 60 Hz circuit. If you need
to use an extension cord – use a 12 gauge
3 prong extension cord.
4.
Fill the QuietCool reservoir
with water
Once your water hose is
securely connected – open the
water flow control handle
(located on the front of your
unit) 1 1/4 turns. This water flow
control handle adjusts the
amount of water going to the
unit’s reservoir. Turn-on water
and fill the reservoir. Listen
carefully. You can hear water
filling the reservoir. Check your water connection – make sure there is no
dripping. Once the reservoir is filled the float valve will automatically shut-
off the water source. Once the water shuts off – you know that the float
valve is fully operational.
5. Turn-on the water pump
Flip the toggle switch for the water pump to “On”. Toggle switch is located
on front side of unit. The water pump will now begin pumping water to the
top / back of the unit so that gravity will allow the water to run down the
backside of unit onto and into the cooling pads. Allow water to run for 10
– 15 minutes on new cooling pads to totally saturate them with water.
Once your units cooling pads are saturated – then, you are ready to turn
on fan and begin to feel the cooling effect from your new QuietCool.
Note: After your cooling pads are broken in (typically 1 -2 weeks) it will
take less time to fully saturate cooling pads for initial start-up.
6. Turn-on Fan
Once your pads are wet – you may turn your QuietCool unit on high. Now
you can begin to feel the QuietCool difference in temperature. After your
QuietCool has run for 5 minutes or so, visually inspect the pads – if water
is dripping outside the unit – you have too much water, simply turn the
flow valve handle to the right 1/4 turn and inspect water flow in another 5
minutes. If you see dry streaks in the cooling pads – open the flow valve
handle 1/4 turn to increase water flow to the cooling pads – check water
flow in another 5 minutes and adjust accordingly. Most QuietCool units
work effectively with valve opened between 1 – 1 1/4 turns.
Note: Back your QuietCool unit up to a fresh air source like an open door
or window so the unit can pull in fresh air from the outside. Next, make
sure you have a natural exhaust at the opposite end of the room, such as
a window or door. This will ensure maximum efficiency from your unit.
Quietaire Cooling Inc.
A Subsidiary of Quietaire Corporation
Telephone: 713.228.9421 Fax: 713.228.9425
505 North Hutcheson Houston, Texas 77003
www.Quietaire.com
48” Quick Start
Connect water hose to unit,
then plug into standard 120
Volt electrical 20 Amp source.
Open water flow
valve 1 ¼
turns to allow water to fill
reservoir.
Page view 0
1 2 3 4 5 6 ... 14 15

Summary of Contents

Page 1 - 48” Quick Start

Carefully examine your QuietCool shipping carton. If your carton is damaged – notify the shipper immediately! (There may be damage to

Page 2 - Owner’s Manual

9 8.0 Storage Remove pads as described above in 7.2 and rinse pads clean with fresh water. Dry cooling pads in sunlight. Drain water reservoir co

Page 3 - Warnings and Cautions

10 9.0 Accessories QCG1001 – Water Stabilizer for 48” unit. The water stabilizer removes harmful calcium,

Page 4 - Table of Contents

11 10.0 Replacement Parts All Accessories / Replacement Parts are obtainable through your local QuietCool distributor. Should a part be temporari

Page 5

12 11.0 Order form Fax Back Order Form Accessories and Replacement Parts For all QC48” fan blade models. For all mot

Page 6

13 12.0 Wiring Diagrams for the 48” unit

Page 7

14 13.0 Warranty WARRANTY WARRANTY AND DISCLAIMER: Quietaire Cooling extends this limited warranty to the original buyer and warrants that produ

Page 8 - Solution

1 48” QuietCool Portable Evaporative Cooler Owner’s Manual This Manual covers the QC48B2 QuietCool Portable Evaporative Cooler. QC48B2

Page 9 - Cause (continued)

2 File this owner’s manual in a safe place for future reference. It contains operating procedures – maintenance procedures – trouble shooting guide

Page 10

3 QuietCool Portable Evaporative Cooler Table of Contents 1.0 Introduction 1.1 Quick Start 1.2 Operate unit for 2 weeks before adding Evap-O-Mat

Page 11

4 QuietCool Portable Evaporative Cooler 1.0 Introduction • Your QuietCool was engineered to be the most efficient portable evaporative cooler ma

Page 12

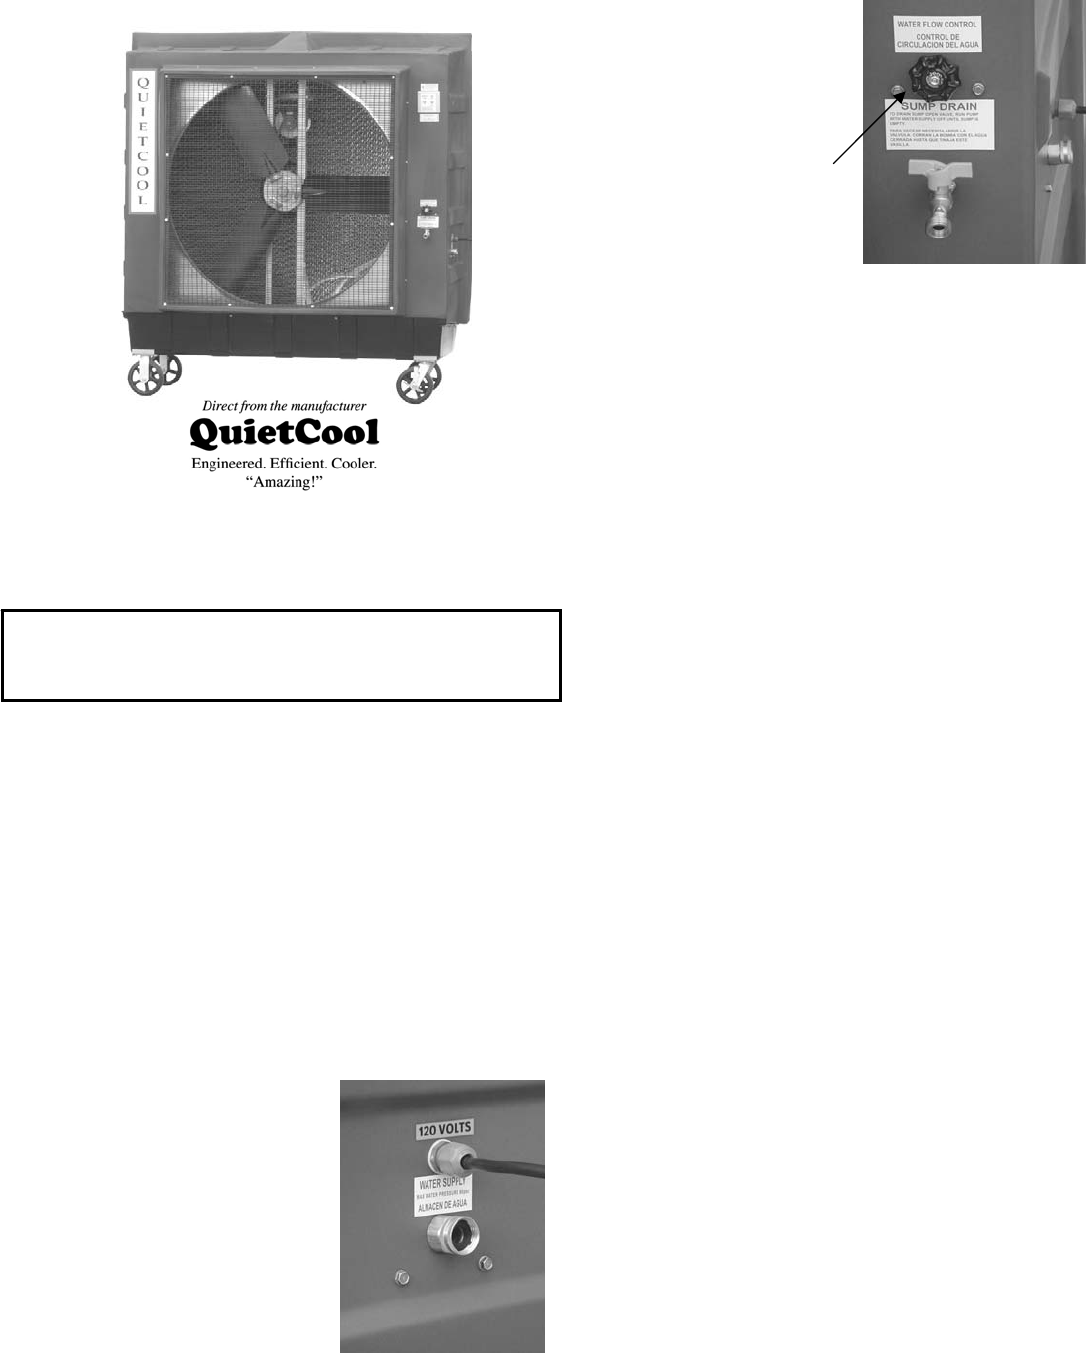
5 4.1 Connecting the electrical supply All QuietCool models require regular 3 prongs, ground with 120 volt power supply. Plug electrical cord into

Page 13 - Fax Back Order Form

6 little to slow the water flow. After the pads are wet – you can open the valve to 1 ¼ turn. Allow water to run for 10 – 15 minutes on new cooling

Page 14

7 7.2 Removing the cooling pads Before your start, make a note of the direction of the angle of the pads flutes (see side of pads). You must put p

Page 15 - 13.0 Warranty

8 Problem (continued) B. Back of unit 2. Found water on floor after overnight shut off. 3. Foul odor from fan A. New U

Comments to this Manuals

No comments